Flooring Trim and Finish Guide

Finishing touches matter just as much as the flooring itself. The right trim, transitions, and underlayment don't just make your installation look polished - they protect your flooring edges, support durability, and create smooth transitions from room to room.

Whether you're working with carpet, vinyl, tile, laminate, or hardwood remnants, every material has its own trim needs. From quarter round to reducers and stair nosing, the right finish pieces help prevent wear, manage expansion gaps, and give your floor a complete, professional look.

This guide walks you through the most common trim and edging options so you can finish your project with confidence. Not sure what you need? Bring your flooring sample or project sketch to Cranberry Remnant Warehouse - our team can help you match materials and recommend the right finishing pieces. Or, contact us with questions about trim options, availability, or compatibility with your flooring remnant.

Why Finishing Pieces Matter

Trim and finishing components are more than just decorative - they play a critical role in the performance and longevity of your flooring. Without them, even a perfectly installed floor can look unfinished or wear out prematurely.

Protect flooring edges: Trim and transition pieces shield vulnerable edges from chipping, moisture intrusion, and daily wear - especially in high-traffic or high-humidity areas.

Hide seams and gaps: Most flooring types require expansion gaps or leave raw edges at walls, doorways, or cabinets. Finishing pieces conceal these spaces for a cleaner appearance.

Create smooth transitions: Thresholds, reducers, and T-moldings make it easy to connect two different flooring materials or adjust for changes in height between rooms - improving safety and visual flow.

Enhance aesthetics: Well-matched trim gives your project a cohesive, polished look, helping your floor blend seamlessly with baseboards, walls, or adjoining surfaces.

Choosing the right finish pieces ensures your flooring looks great, functions properly, and holds up over time.

Types of Flooring Trim

Finishing a flooring project isn't just about what's underfoot - it's about how cleanly and safely the flooring meets the rest of the room. Trim pieces serve both a functional and aesthetic purpose, covering raw edges, accommodating movement, and helping different flooring surfaces transition smoothly from one area to another. Here's a closer look at the most common types of flooring trim and how to choose the right one for your project.

Quarter Round & Shoe Molding

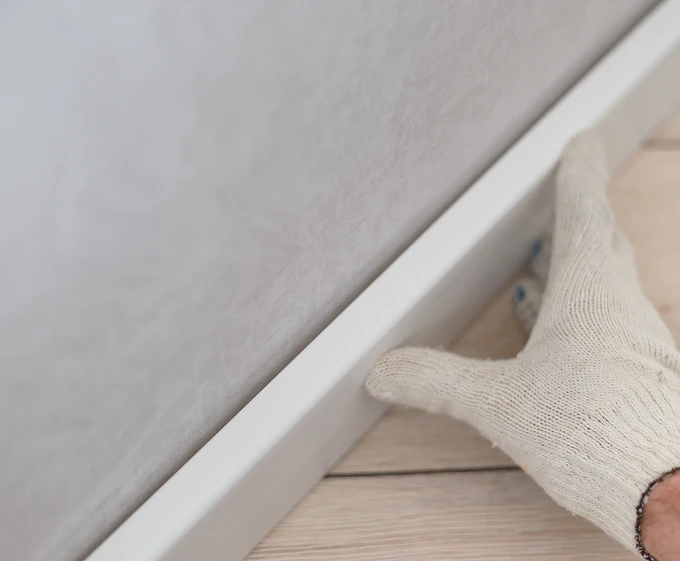
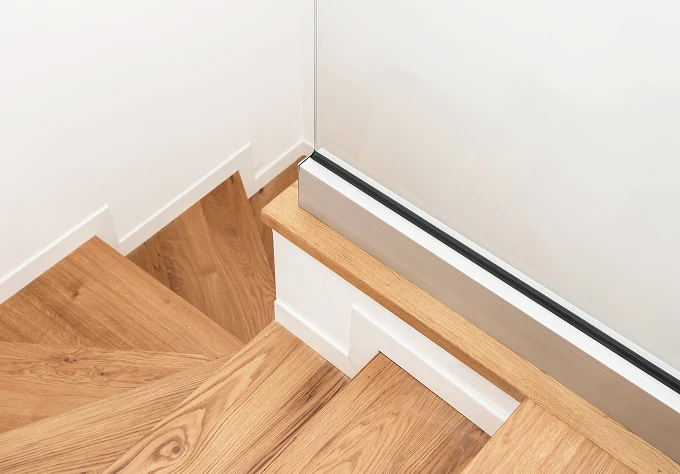
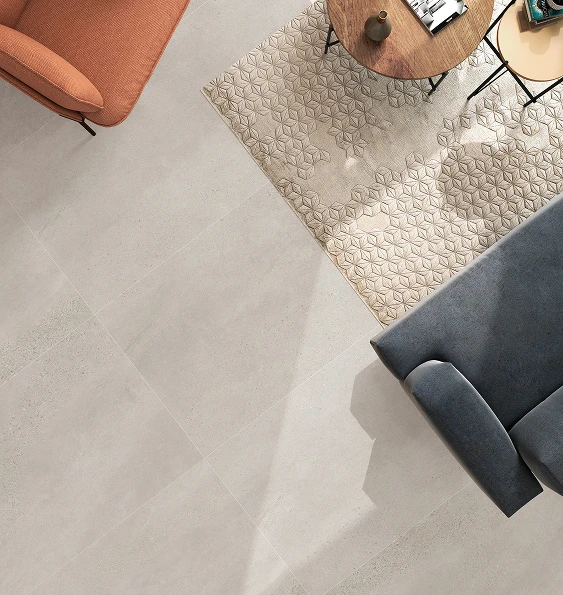
Quarter round and shoe molding are small but essential trim pieces that run along the base of your walls. These rounded profiles are used to cover the expansion gaps left around the perimeter of floating floors - gaps that are necessary for the flooring to expand and contract with humidity changes.

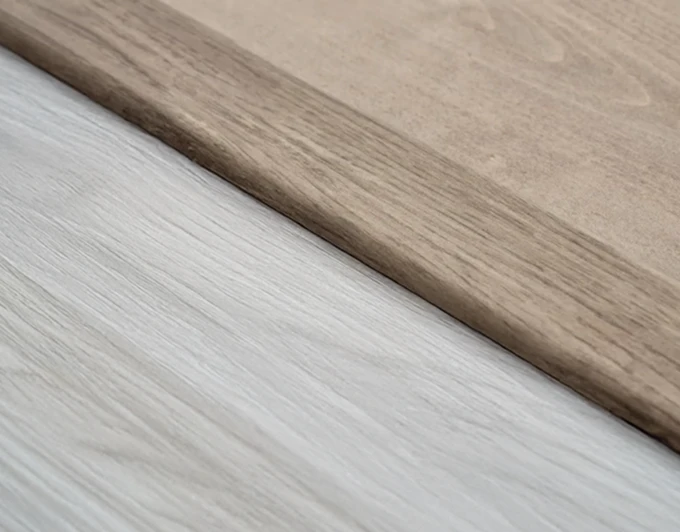
  • Quarter round has a full, rounded profile and adds a more pronounced visual frame at the floor's edge
  • Shoe molding is slightly thinner and offers a more subtle finish
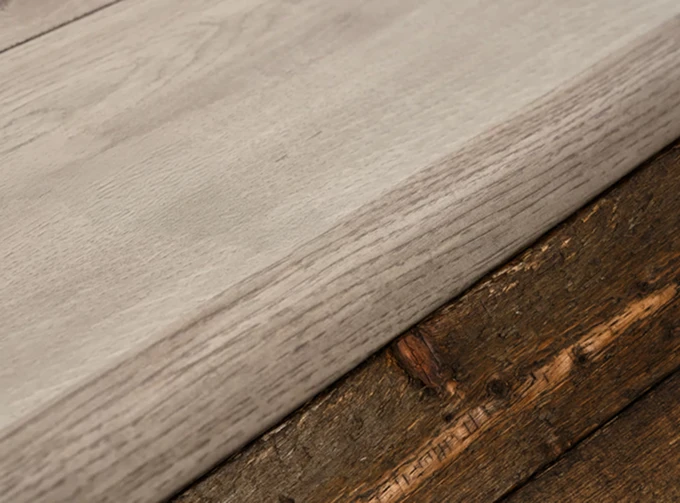
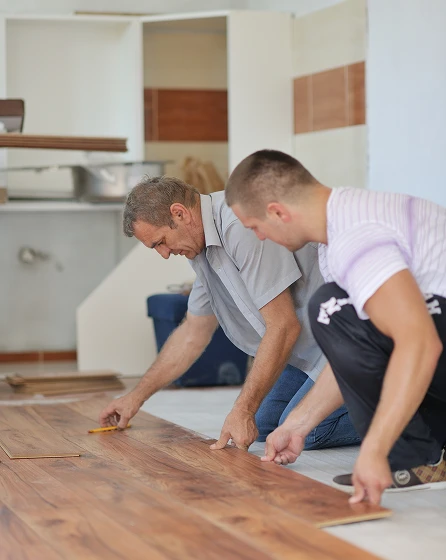
  • Both are commonly used with laminate, hardwood, and luxury vinyl plank (LVP) installs
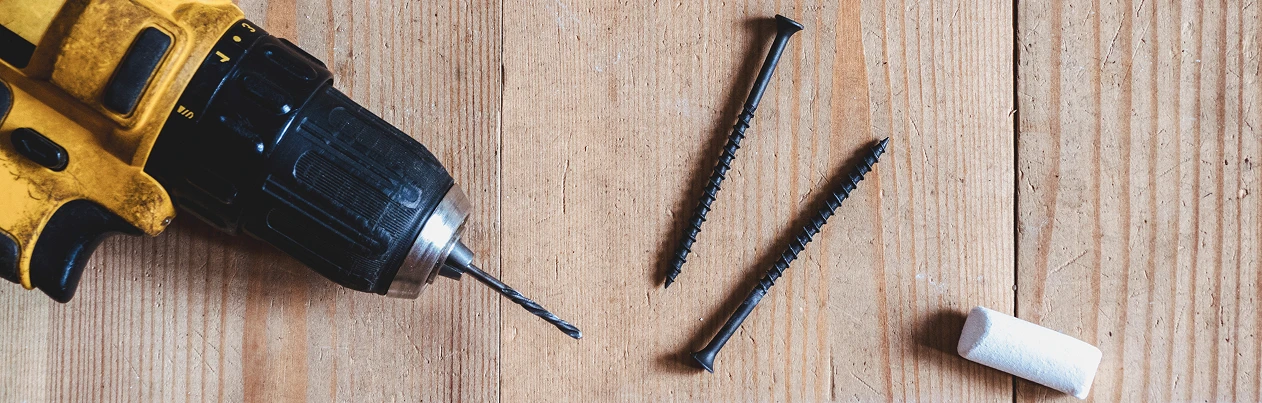
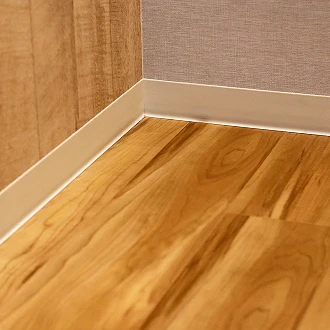
  • They're typically nailed or glued in place and can be painted or stained to match your baseboards or flooring

These pieces help prevent dust and moisture from collecting in those expansion spaces and give the floor a polished, intentional finish.

T-Molding

T-molding is designed to transition between two hard surface floors of the same height. It fits into a small expansion space left between the two flooring types and allows each side to move independently.

  • Best used in doorways between rooms with LVP to laminate, or laminate to laminate installs
  • Helps preserve the floating floor's integrity by allowing it to expand without resistance
  • Available in colors and finishes to match your flooring

T-molding is a must-have for floating floors installed in large, continuous spaces that are broken into zones (like a hallway leading to bedrooms) and ensures the floor can shift naturally with seasonal changes.

Reducer Strips

Reducer strips provide a smooth transition between two flooring surfaces of different heights. Whether you're stepping down from laminate to sheet vinyl, tile to concrete, or hardwood to LVP, reducers prevent tripping and deliver a clean, tapered finish.

  • Sloped design helps blend elevation changes for safety and visual appeal
  • Especially important in entryways, kitchens, or rooms with multiple flooring types
  • Also useful when flooring meets thresholds or sliding glass doors

Choosing the right style and color of reducer ensures that even practical transitions look intentional and cohesive.

Stair Nosing

Stair nosing is one of the most critical trim pieces when installing flooring on steps. It caps the edge of each stair tread to protect it from chipping and wear while also providing a slip-resistant edge.

  • Essential when installing hardwood, vinyl plank, tile, or carpet on staircases
  • Comes in square-edge or bullnose profiles, depending on the look and safety needed
  • Can be color-matched to flooring or contrasted for added visibility (helpful in darker stairwells)

Installing stair nosing correctly ensures a longer-lasting floor and adds a layer of safety to one of the most-used areas in the home.

End Caps (or Square Nosing)

End caps are used where the flooring stops cleanly, such as at a fireplace hearth, entry threshold, or sliding glass door. They create a defined border and protect the exposed ends of planks or tiles from moisture and damage.

  • Ideal for rooms that open onto unfinished spaces or for separating flooring from non-floor areas
  • Square nosing offers a blockier, modern edge; traditional end caps are slightly beveled
  • Helps protect corners and reduce chipping on exposed plank edges

If your floor ends mid-room or meets an architectural feature like a step-down, end caps create a seamless visual break.

Carpet Trim & Metal Edging

These finishing pieces are used at transitions where carpet meets a hard surface, like vinyl, tile, or wood.

  • Carpet trim typically tucks the carpet edge underneath a metal or rubber channel and secures it with nails, tack strips, or adhesive
  • Metal edging comes in polished or matte finishes like silver, bronze, or black, and offers a sleek, professional look while preventing fraying and movement
  • Ideal for doorways, hallways, or stairs, especially in high-traffic areas

In addition to their durability, metal trims act as a visual divider, helping signal a flooring change in multi-surface rooms.


Together, these trim pieces do more than just complete the look - they also protect your investment, improve safety, and ensure your flooring project stands the test of time. Not sure which trim you need for your room layout or remnant type? Bring your measurements or photos to Cranberry Remnant Warehouse, and we'll help you find the right finish.

Choosing the Right Transition Pieces

Transition pieces are essential for connecting flooring materials between rooms or across changes in height. Done well, they not only look clean but prevent wear, tripping hazards, and future damage where two surfaces meet. The right transition piece depends on your materials, layout, and level changes from room to room.

Start by matching the finish to your flooring. Look for trim pieces in similar colors, wood tones, or finishes to create a seamless appearance. Most stores - including Cranberry Remnant Warehouse - stock a variety of neutral, wood-look, or metallic options that can blend with multiple flooring types.

Here's how to choose the right type:

Use T-molding where two types of flooring meet at the same height - like luxury vinyl plank meeting laminate in an open plan layout.

Use a reducer strip when transitioning between two surfaces of different heights - such as laminate to sheet vinyl or carpet to tile.

Always use stair nosing where flooring ends at the edge of a stair tread. It creates a smooth, finished edge and adds safety by reinforcing one of the highest wear points in the home.

If you're unsure what you need, our staff can help you choose based on your layout, flooring type, and finish preference. Many of our in-stock flooring remnants have coordinating or compatible trim options available. Bring your measurements, material details, or a photo of the space, and we'll help you find the right piece to complete your install. Still unsure? Feel free to contact us for personalized help choosing the right transition components.

Installing Trim: What to Know About Adhesives & Fasteners

Installing trim correctly is just as important as choosing the right piece. Whether you're finishing the edges of a floating laminate floor or capping a carpet-to-tile transition, using the right installation method ensures your trim stays secure and looks clean over time.

Nails vs. Adhesive: What to Use Where

  • Nails (brad nails or finish nails) are most commonly used for installing quarter round, shoe molding, and baseboard-adjacent trims. They offer strong mechanical hold and allow the trim to flex with seasonal floor movement - especially helpful on floating floors like laminate or LVP.
  • Adhesive is a good option for metal edging, end caps, or where nails aren't ideal - like concrete subfloors or areas near radiant heat. Choose construction-grade adhesives that bond to both the trim and the flooring surface.

Floating vs. Glued-Down Floors

Trim installation should always respect the flooring type:

  • For floating floors, never attach trim directly to the flooring itself. Instead, affix it to the wall or subfloor so the floor can expand and contract freely beneath it.
  • For glue-down flooring, trims can be fixed directly adjacent or on top of the edge (like carpet trim or metal transitions), as the floor is already locked in place.

Trim Prep Before Install

Before installing trim, take a moment to check for finishing needs:

  • Sanding may be needed to smooth out raw wood trim before painting or staining.
  • Staining or painting should be done before installation for best coverage – touch-ups can be applied after.
  • Sealing is especially important in moisture-prone areas like bathrooms or basements. For tile transitions, ensure grout lines and trim edges are sealed to prevent water seepage.

Need help deciding which trim method works best for your room layout or flooring type? Stop by Cranberry Remnant Warehouse - or review our How to Install Flooring Remnants guide for material-specific advice.

Maintaining Your Trim for Long-Term Performance

Once your trim is installed, keeping it in good shape ensures your flooring continues to look polished and perform well over time. While trim pieces are small, they handle a lot - foot traffic, cleaning tools, and everyday wear from furniture, pets, and moisture.

Cleaning Trim the Right Way

  • For painted trim, use a damp cloth with mild soap to clean scuffs, dust, or buildup. Avoid harsh cleaners or abrasive pads, which can strip the finish.
  • For stained and sealed trim, use a wood-safe cleaner and dry the area promptly to preserve the finish and prevent warping or fading.

Touching Up Damage

Even durable trim can get nicked or scratched over time - especially in high-traffic zones like hallways, entryways, or staircases. Keep extra stain, paint, or finish on hand to touch up:

  • Minor scuffs with a wood marker or stain pen
  • Chips or dents with wood filler followed by a light sanding and refinishing
  • Repainting sections of baseboard or molding for a refreshed look

Moisture-Proofing Transitions

In kitchens, bathrooms, laundry rooms, or basements, resealing tile transitions or metal trim is key:

  • Reapply a waterproof caulk or sealant at the edges where flooring meets tubs, sinks, or appliances every 1 - 2 years.
  • Inspect grout and thresholds for cracks or lifting - addressing these early prevents water intrusion and long-term floor damage.

Need product recommendations or have questions about maintaining a specific type of trim? Bring a photo or your material details into Cranberry Remnant Warehouse. We'll help you choose the right cleaner, sealant, or repair method to keep your floor looking finished for years to come.

Visit Cranberry Remnant Warehouse for Trim Options

Finishing your flooring project doesn't stop with the last plank or tile. Trim and transition pieces complete the look - and at Cranberry Remnant Warehouse, we're here to help you get it right.

Bring a sample of your flooring remnant or a clear photo of your space, and our team will walk you through available trim styles that match in both color and function. Whether you're working with carpet, laminate, vinyl, tile, or hardwood, we'll help you find edging that protects your floor and blends seamlessly into your room's design.

Not sure which trim goes where? We'll explain how each option installs, how it transitions into other flooring types, and what tools you may need for the job. From stair nosing and reducer strips to T-molding and end caps, we've got you covered with the finishing details that make all the difference.

Still planning your install? Explore our How to Install Flooring Remnants guide for step-by-step help, or check out How to Choose Flooring Remnants to make sure your base materials and trim are a perfect match.

Finish Strong with the Right Trim

No flooring project is truly complete without the right finishing touches. Trim, transitions, and underlayment don't just make your installation look polished - they also protect your flooring from wear, moisture, and everyday movement.

By choosing the correct edge pieces and barrier layers, you're not only improving appearance but also extending the life and performance of your new floor. Whether you're installing carpet, vinyl, tile, laminate, or hardwood remnants, make sure your project ends as strong as it starts.

Visit Cranberry Remnant Warehouse, and let our team help you finish with confidence. Can't stop by? Contact us and we'll help you get started remotely.

FAQs About Flooring Trim, Transitions & Finishing

What is the purpose of flooring trim?

Flooring trim hides expansion gaps, protects flooring edges, and creates clean transitions between rooms or materials. It also gives your floor a more finished, professional look.

Do I need trim for all types of flooring remnants?

Yes. Whether you're installing carpet, vinyl, tile, laminate, or hardwood remnants, trim pieces like quarter round, reducers, or stair nosing are essential for protection and appearance.

What's the difference between quarter round and shoe molding?

Quarter round is a more pronounced rounded profile, while shoe molding is thinner and more subtle. Both are used to cover expansion gaps along walls for floating floors like LVP and laminate.

What is a flooring reducer strip used for?

Reducer strips bridge two flooring types of different heights - like transitioning from laminate to vinyl or hardwood to tile - while minimizing trip hazards and wear on the edges.

When should I use T-molding in a flooring install?

T-molding is used when connecting two floors of equal height, such as LVP to laminate. It allows expansion movement and provides a clean, flush transition between rooms.

How does stair nosing improve flooring safety?

Stair nosing reinforces stair tread edges to prevent chipping, offers better grip, and provides a finished visual. It's critical for vinyl, hardwood, tile, or carpeted stairs.

Can I install trim directly onto a floating floor?

No. Trim for floating floors should be attached to the wall or subfloor - not to the flooring - so the planks can expand and contract without restriction.

What adhesive should I use for trim on concrete floors?

For concrete subfloors, use a construction-grade adhesive suitable for flooring trim. This is especially common for end caps, reducers, or metal edging pieces.

How do I choose trim color to match my flooring remnant?

Bring a sample or clear photo of your flooring to Cranberry Remnant Warehouse. We offer a range of neutral and wood-look trim pieces that blend with most flooring types.

What's the best trim for carpet to tile transitions?

Use carpet trim or metal edging. These secure the carpet edge while providing a clean, durable boundary where it meets tile or another hard surface.

Do I need underlayment beneath my flooring trim?

Underlayment is used under the flooring itself - not under trim - but it impacts how trim sits. Foam, cork, or vapor barrier underlayments may affect trim height or spacing needs.

How do I clean and maintain my trim after install?

Painted trim should be wiped with mild soap and water; stained trim should be cleaned with a wood-safe cleaner. Reseal tile trims in wet areas as needed to prevent water damage.

How often should I reseal trim in bathrooms or basements?

Check tile transitions or metal trim every 1 - 2 years in high-moisture areas. Resealing prevents water intrusion that can damage both trim and flooring edges.

Can I use the same trim on stairs and floors?

Not always. Stair nosing is a specialized trim designed for safety and durability on treads. Standard floor trim like quarter round isn't suitable for stair edges.

Where can I get help choosing the right trim for my project?

Visit Cranberry Remnant Warehouse. Our team will help you match trim to your flooring remnant and room layout - no appointment needed.